Hibernate :
1)is an ORM tool
2)used in the data layer of the application
3)provides lot of advantages over JDBC.
First Understand this problem.
Object
Relation


1)is an ORM tool
2)used in the data layer of the application
3)provides lot of advantages over JDBC.
First Understand this problem.
|
Employee Class
|
|
EmpId long
|
|
Name String
|
|
Designation String
|
|
Location String
|
Object
Relation
|
EmpId bigint
|
Name
varchar
|
Designation
varchar
|
Location
varchar
|
|
|
|
|
|
|
|
|
|
|
|
|
|
|
|
|
|
|
|
|
We have an Employee Class and Employee Table.
but how can we save employee object inside employee table.
yes we can do it by using traditional JDBC using Insert query.
Disadvantages if we use JDBC.
we need to design the Database, if we use hibernate it will take care of it.
we need to write sql queries to each DB operation, using Hibernate API, no need to write these queries just call hibernate APIs.
many other advantages of hibernate which jdbc alone can not give it like caching and etc.
lets see Hibernate Setup
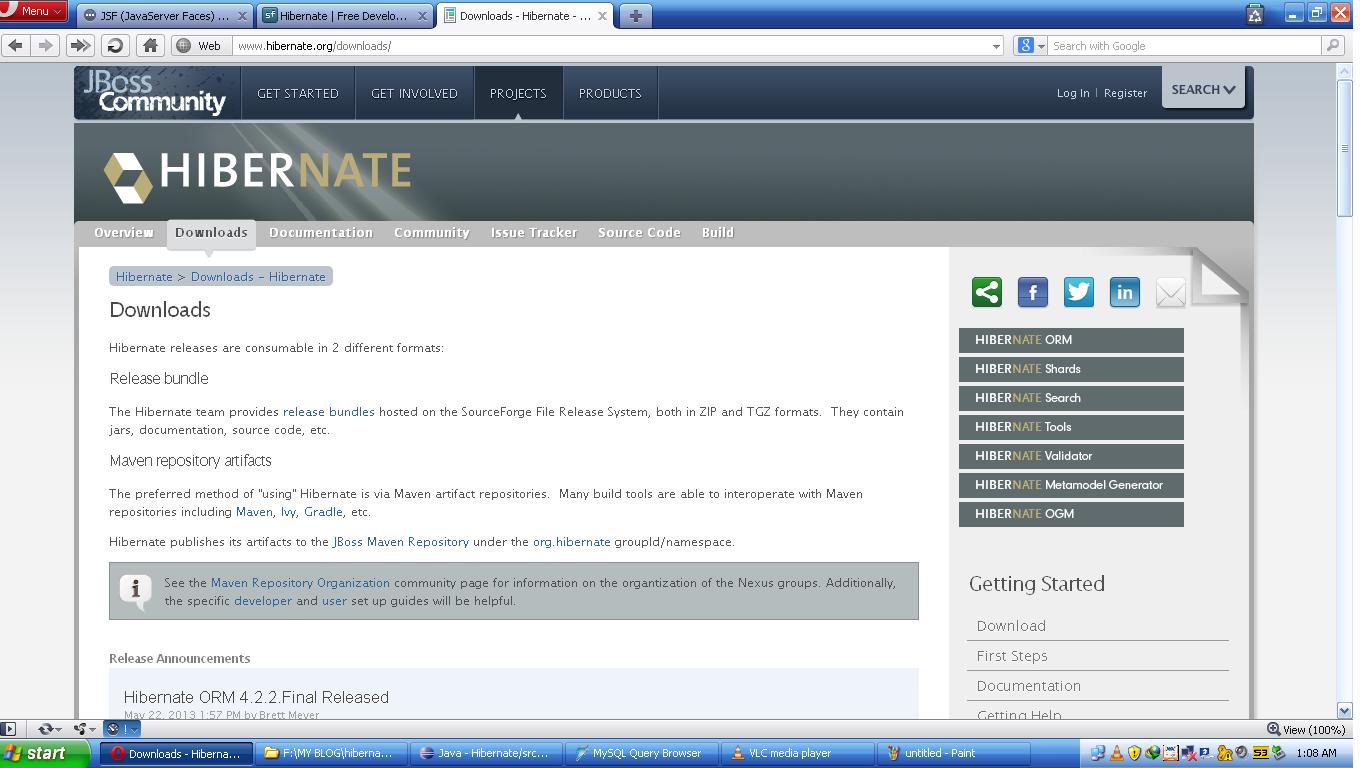
1)download hibernate from the website hibernate Download
refer the below screenshot for the same.


2)Unzip the downloaded zipped folder.
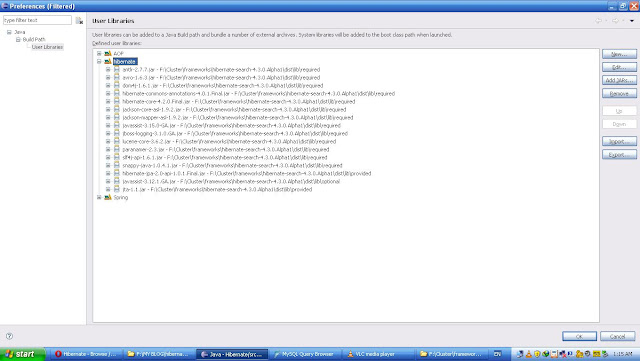
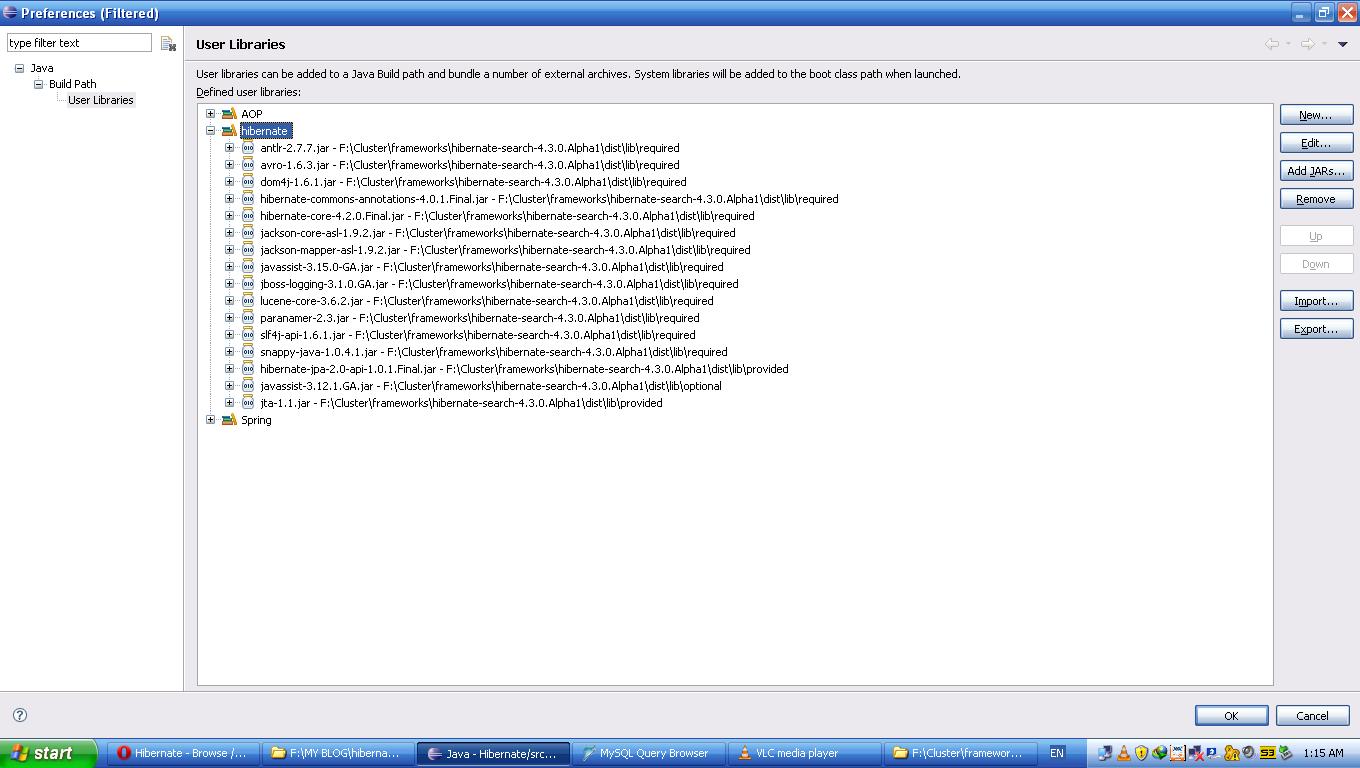
3)Create a new java project in eclipse and set the build path with the following jars from the downloaded unzipped bundle
4)Install the Database and add its driver jar to project classpath, i have added mysql jar as i have installed mysql db.

5)Now create the most important config file for hibernate - hibernate.cfg.xml
code is as below and change the username passwd database details based on your settings.
<?xml version='1.0' encoding='utf-8'?>
<!DOCTYPE hibernate-configuration PUBLIC
"-//Hibernate/Hibernate Configuration DTD//EN"
"http://www.hibernate.org/dtd/hibernate-configuration-3.0.dtd">
<hibernate-configuration>
<session-factory>
<property name="connection.driver_class">com.mysql.jdbc.Driver</property>
<property name="connection.url">jdbc:mysql://localhost:3306/hibernate</property>
<property name="connection.username">root</property>
<property name="connection.password">root</property>
<!-- JDBC connection pool (use the built-in) -->
<property name="connection.pool_size">1</property>
<!-- SQL dialect -->
<property name="dialect">org.hibernate.dialect.MySQLDialect</property>
<!-- Enable Hibernate's automatic session context management -->
<property name="current_session_context_class">thread</property>
<!-- Disable the second-level cache -->
<property name="cache.provider_class">org.hibernate.cache.NoCacheProvider</property>
<!-- Echo all executed SQL to stdout -->
<property name="show_sql">true</property>
<!-- Drop and re-create the database schema on startup -->
<property name="hbm2ddl.auto">create</property>
<property name="hibernate.search.default.directory_provider">filesystem</property>
<property name="hibernate.search.default.indexBase">target/indexes</property>
<!-- maps the associated model classes -->
<mapping class="com.kb.model.Employee"/>
</session-factory>
</hibernate-configuration>
6)Create a model class and add it to hibernate.cfg.xml as shown above in bold.
code is as below
package com.kb.model;
import javax.persistence.Entity;
import javax.persistence.Id;
@Entity
public class Employee {
@Id
private long empId;
private String firstName;
private String lastName;
private String role;
public long getEmpId() {
return empId;
}
public void setEmpId(long empId) {
this.empId = empId;
}
public String getFirstName() {
return firstName;
}
public void setFirstName(String firstName) {
this.firstName = firstName;
}
public String getLastName() {
return lastName;
}
public void setLastName(String lastName) {
this.lastName = lastName;
}
public String getRole() {
return role;
}
public void setRole(String role) {
this.role = role;
}
}
observe the 2 minimum reqd annotations @entity and @id
@entity - says hibernate that this entity has to be persisted in the DB.
@id - says that this attribute must be the primary key in the table.
Now create a client program which uses hibernate api to persist the Employee object.
package com.kb.dao;
import org.hibernate.Session;
import org.hibernate.SessionFactory;
import org.hibernate.cfg.Configuration;
import com.kb.model.Employee;
public class Client1 {
@SuppressWarnings("deprecation")
public static void main(String[] args) {
Employee emp = new Employee();
emp.setEmpId(10655697);
emp.setFirstName("lingu");
emp.setLastName("gc");
emp.setRole("SE");
// Hibernate API to persist employee object
SessionFactory sessionFactory = new Configuration().configure()
.buildSessionFactory();
Session session = sessionFactory.openSession();
try {
session.beginTransaction();
session.save(emp);
session.getTransaction().commit();
} catch (Exception e) {
session.getTransaction().rollback();
} finally {
session.close();
}
}
}
here we have used hibernate session's save method to persist employee emp object.
this save method internally generates sql insert query according to mysql syntax and runs it using JDBC.
but as a programmer we dont have to care about it.
Now run the above client program and see the following output in mysql query broswer

Lets see further hibernate concepts in the next post.


